

What Are The Shirt Templates For On The Cricut Machine

The best tutorial for how to make a shirt with a Cricut! Everything you lot need to know from how to design, to cut Cricut atomic number 26 on vinyl, to ironing it onto a t-shirt! You'll be a pro 'Cricut shirt maker' in no fourth dimension.
*This post contains affiliate links.

Hey guys, we've got a super fun Cricut project for you today. You lot can brand whatsoever shirt you lot've wanted or dreamed up!
It's so fun to limited yourself with a t-shirt you lot have designed yourself. Personalized shirts make platonic gifts, are a fun way to gloat holidays or birthdays, and perfect for family unit trips (similar Disney!) The list goes on.
Since getting our Cricut machines a five or six years ago, we take become professional person Cricut Shirt Makers. No, really, it's truthful!
We taught a class on How to Brand Shirts with Cricut to over 150 beginners and Cricut enthusiasts at the 2018 Cricut Mountain Brand-a-Thon. And then let us share all of the details and pro-tips with you lot. It's gonna be fun!
How to Make a Shirt with Cricut Iron On Vinyl
Making a t-shirt requires two important steps, and we're going to go in-depth on both of them:
- Blueprint it. We suggest sticking with one color on your offset endeavour. Words, phrases or simple images are perfect.
- Cutting and utilize the iron-on.
Need design inspiration? Check out ALL of our Cricut T-Shirts, and for more blueprint advice cheque out: Cricut Fonts – Everything You Need to Know – or watch our video on YouTube! In it we share our FAVORITE Cricut fonts and answer FAQ.
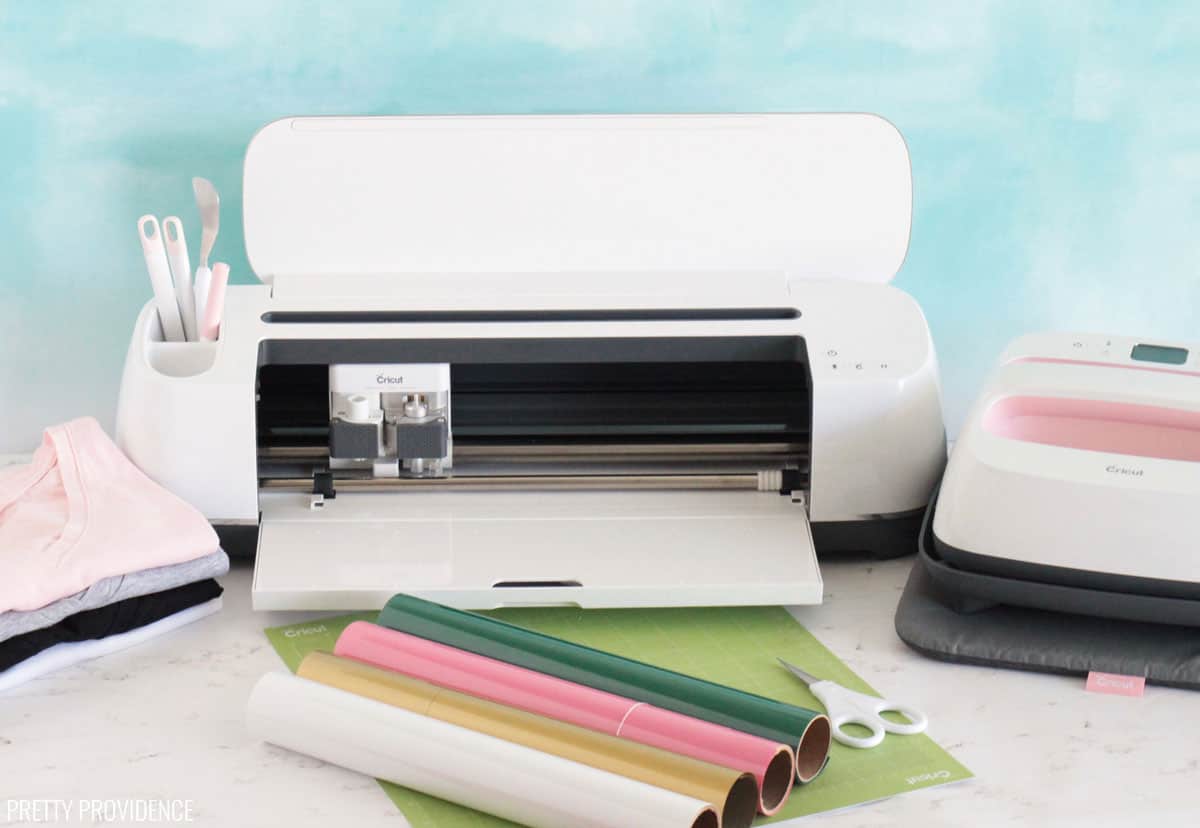
What you demand to brand a Cricut shirt:
Since this tutorial is for beginners, I'yard not just listing the items, I'm besides going to explain what they are!
Necessary:
- Plain T-Shirt: the best shirt materials for iron-on vinyl are cotton fiber or cotton fiber blends. More of our favorite t-shirts for atomic number 26-on are listed below.
- Cricut Everyday Fe-On Vinyl: At that place are quite a few different kinds of iron-on but Everyday Iron-On is the well-nigh commonly used and comes in tons of colors.
- StandardGrip Cricut Mat: You apply this light-green Cricut mat for materials with medium weight – like Iron-On, Vinyl, and heavy card stock.
- Cricut Machine: all of the machines (Cricut Maker, Explore Air two or Joy) can cutting Iron-On vinyl!
- Design Space software: downloaded to your estimator. Alternatively, you lot can apply the Cricut Design app on a tablet or mobile device.
- Atomic number 26:A regular household atomic number 26 will do the job of transferring the fe-on to a t-shirt. Make certain the steam setting is turned off.
Nice to have:
- Weeding Tool: optional, only helpful,this little hook-shaped tool helps you to remove the extra bits of atomic number 26-on from a design before you atomic number 26 information technology on.
- Iron-On Protective Sheet:A non-stick sheet designed specifically for iron-on application. It evenly distributes rut from your fe or rut press.
- EasyPress ii:The EasyPress ii is a heat printing that yous tin can use in place of an iron. It takes less time, the temperature is easier to command, and it's made specifically for iron-on. Read our thoughts on the EasyPress 2.
Favorite T-Shirts for Fe-On
- Bella Canvas – comes in SO many colors and they are super soft! You can buy them from Amazon or Jiffy Shirts
- Gildan Softstyle – These are comfortable and soft too!
- Universal Thread Relaxed V Neck – I purchase these the nearly often because I love the five-cervix, fit and softness!
How to brand a Cricut shirt – step past step:
Blueprint
Option ane: Upload an Image or SVG to Cricut Blueprint Infinite
- Click 'Upload ' on the left side of Cricut Pattern Space. The screen yous meet next will show a library of images you might accept previously uploaded, and a button to upload a new image. Click that.
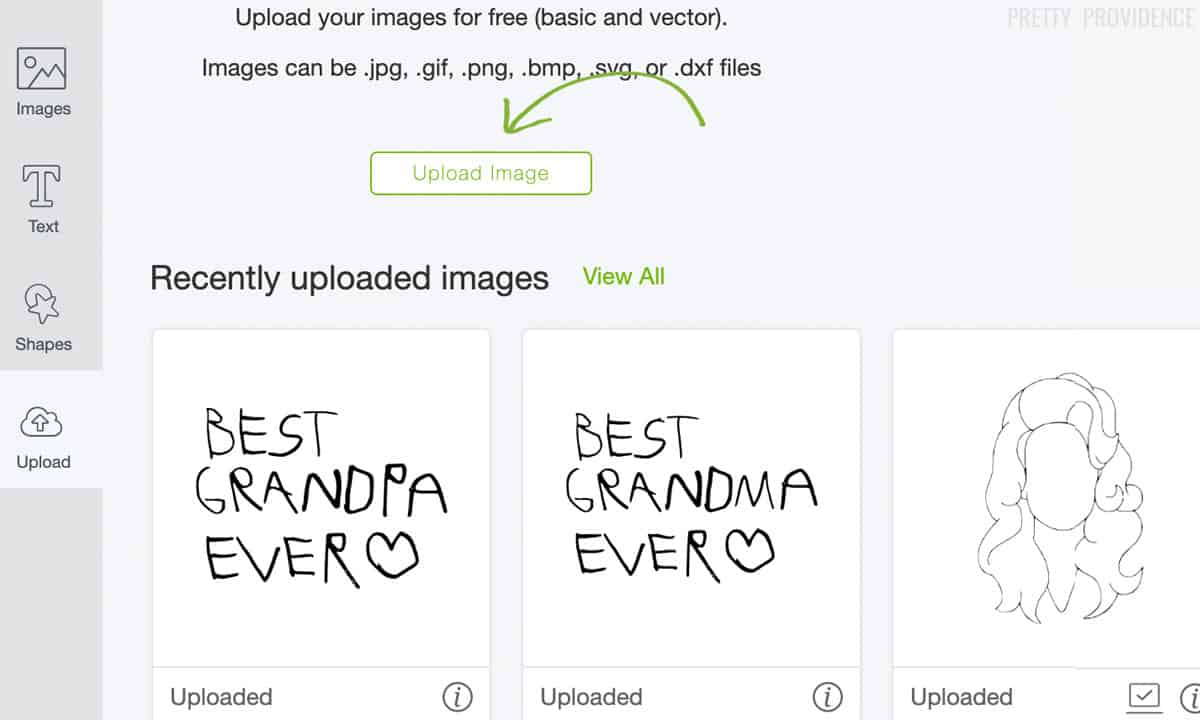
Select your epitome. Now you can select what blazon of image it is. For this project, and most projects with fe on, you lot'll select 'Simple.'

At present yous click the whitespace that you'd similar cutting out. Think to get the insides of each letter if yous're uploading words. This is really fun for me for some reason. It takes me back to my Microsoft Pigment days when I used to employ the Bucket tool. Call up that?

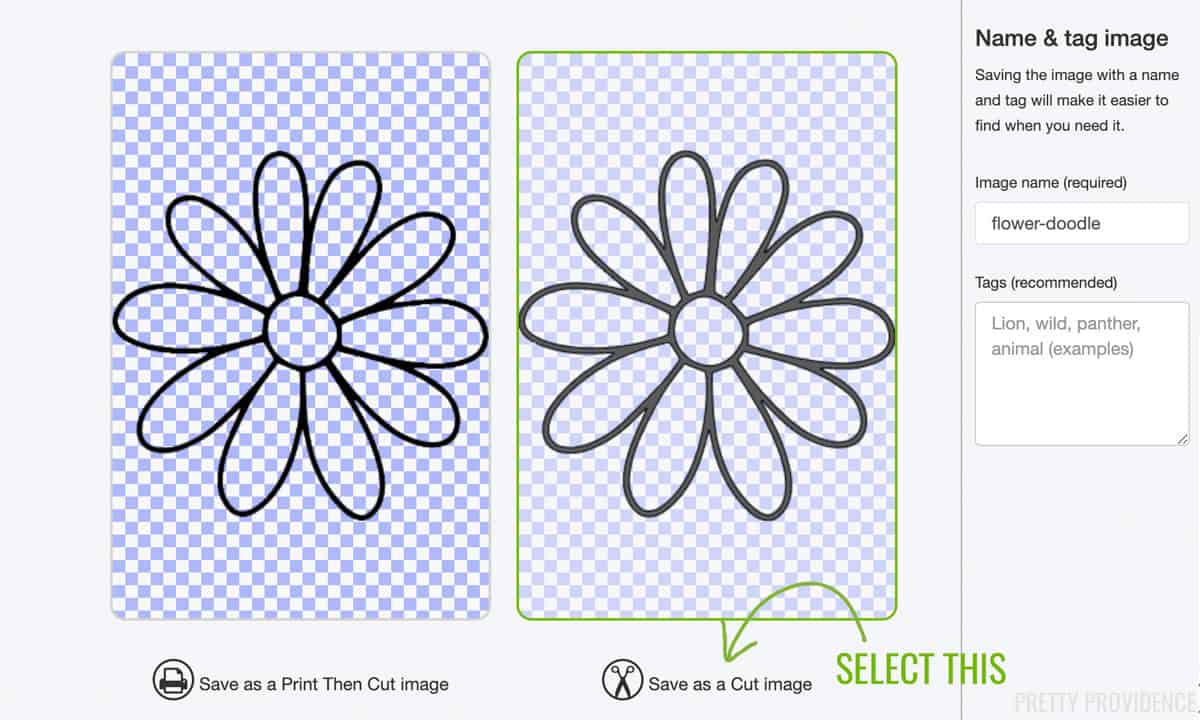
This next step is of import! (Most of them are important only this is pretty easy to miss.) Select 'Cutting Image' – NOT 'Print then Cut Image'. (Impress and then cutting is a completely unlike projection type.)
Option two: Create a Design in Cricut Design Space
You can play around in Cricut Design Space and look through their library of images and fonts. Blueprint away! The Cricut Admission library has thousands of images and hundreds of fonts included. Read more about Cricut Access!
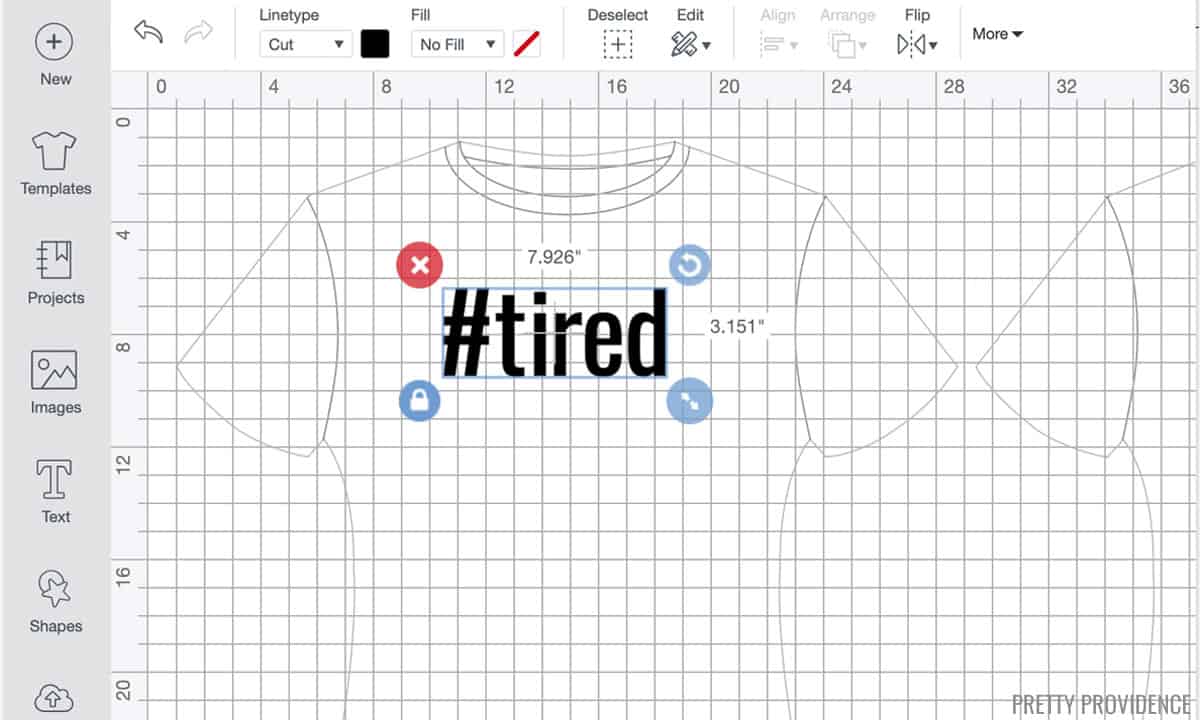
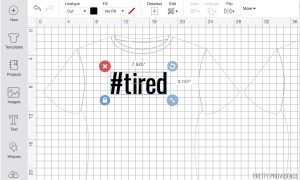
Size The Design
After you have uploaded a pattern (like an SVG file) or created something in Cricut Design Space, information technology's time to make sure it is sized correctly for your t-shirt.
I recommend using a template to figure out how large to make your design.
On the left hand side in Design Space, click on 'Templates.' You can browse all of the templates or search for a specific type. If yous search 'shirt' all of the options come up in that location.
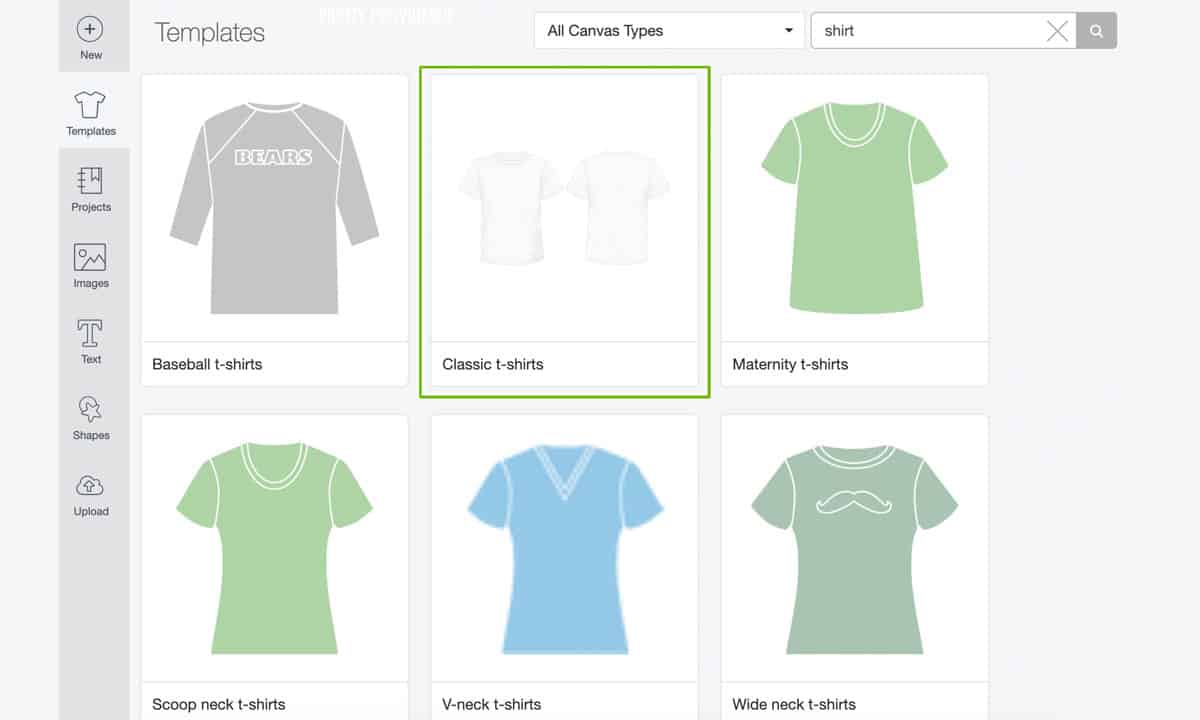
When y'all select ane, it will appear on your design canvas and yous tin visualize what the blueprint will look like on your shirt.
T-Shirt Design Pro Tips:
- Be mindful of how wide your design is. I recommend leaving at least a few inches on either side of your design so that it doesn't bend to the side and encounter the armpits of the t-shirt.
- Utilise a ruler, or your Cricut mat, to measure how many inches beyond the shirt you want to embrace. I like to mensurate every shirt since they always vary in sizing.
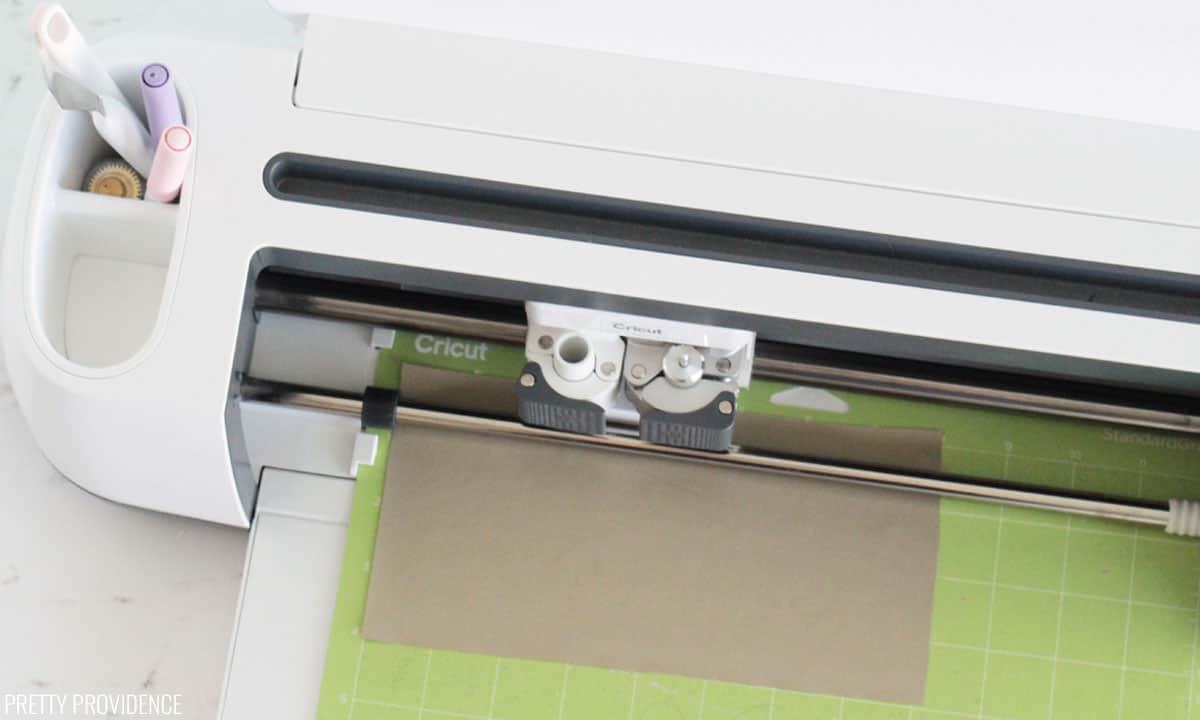
How to Cut Cricut Iron On Vinyl

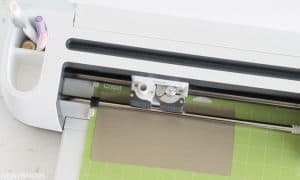
Place iron on vinyl shiny side down on your mat.
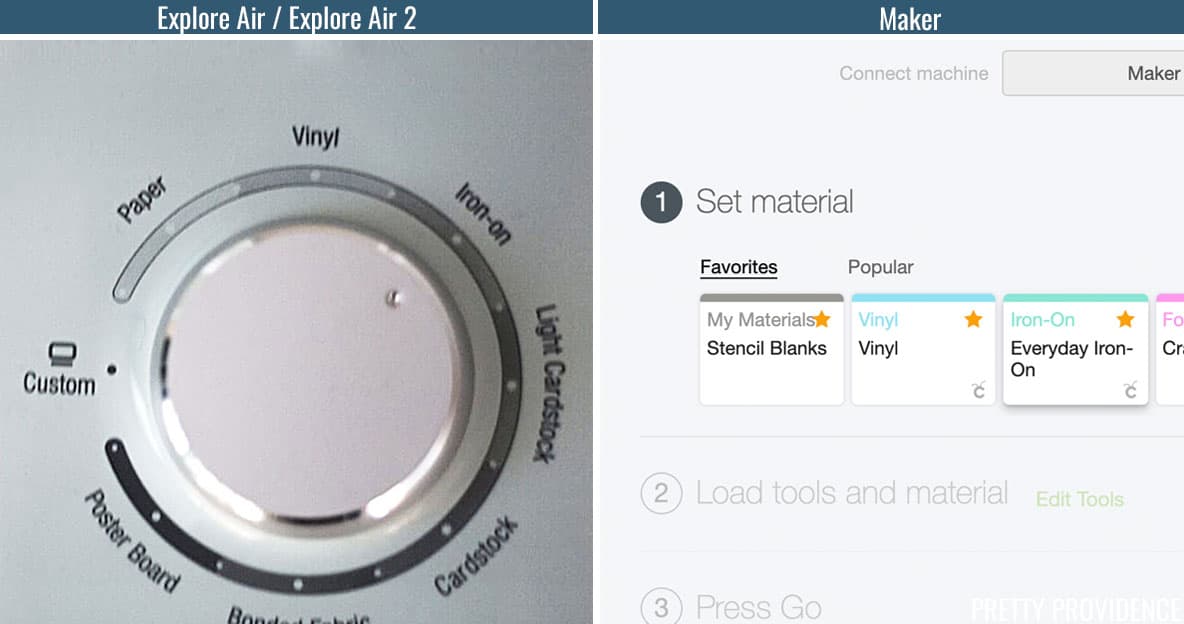
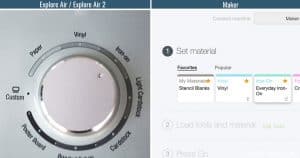
Next, choose the material.
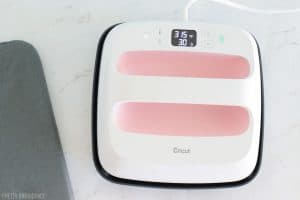
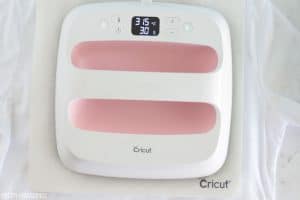
- If y'all're using a Cricut Explore auto, you lot will plough the dial to Fe-on. [left paradigm]
- If you're using a Cricut Maker or Cricut Joy, select Everyday Iron-On from the materials drop-downward carte du jour. [right image]
So click 'Cut'
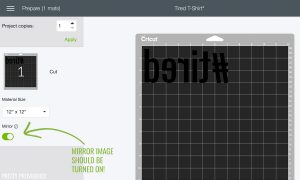
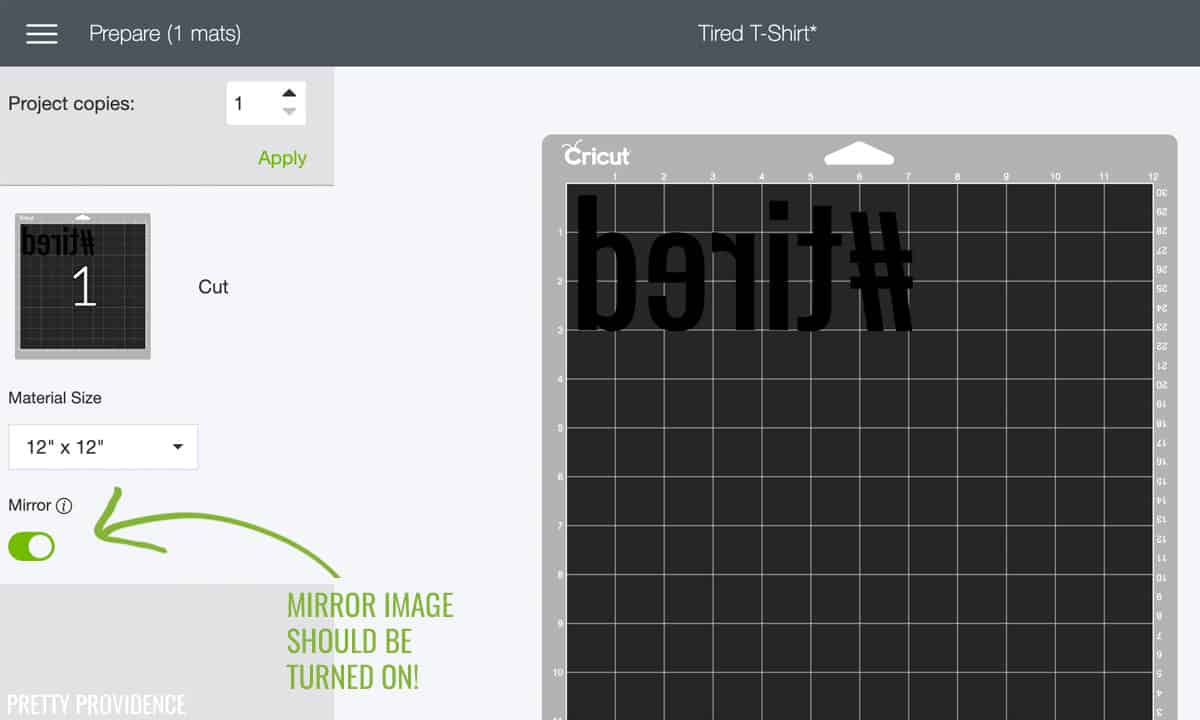 Click 'Mirror epitome for Iron-On' earlier hitting 'Go.' That's an of import and easy-to-miss step.
Follow the prompts and let the motorcar cutting the pattern.
When it is finished, unload the mat.

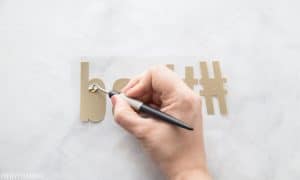
Remove the excess vinyl effectually the edges. If you take a weeding tool, it will be easier to take out the little pieces inside the letters.
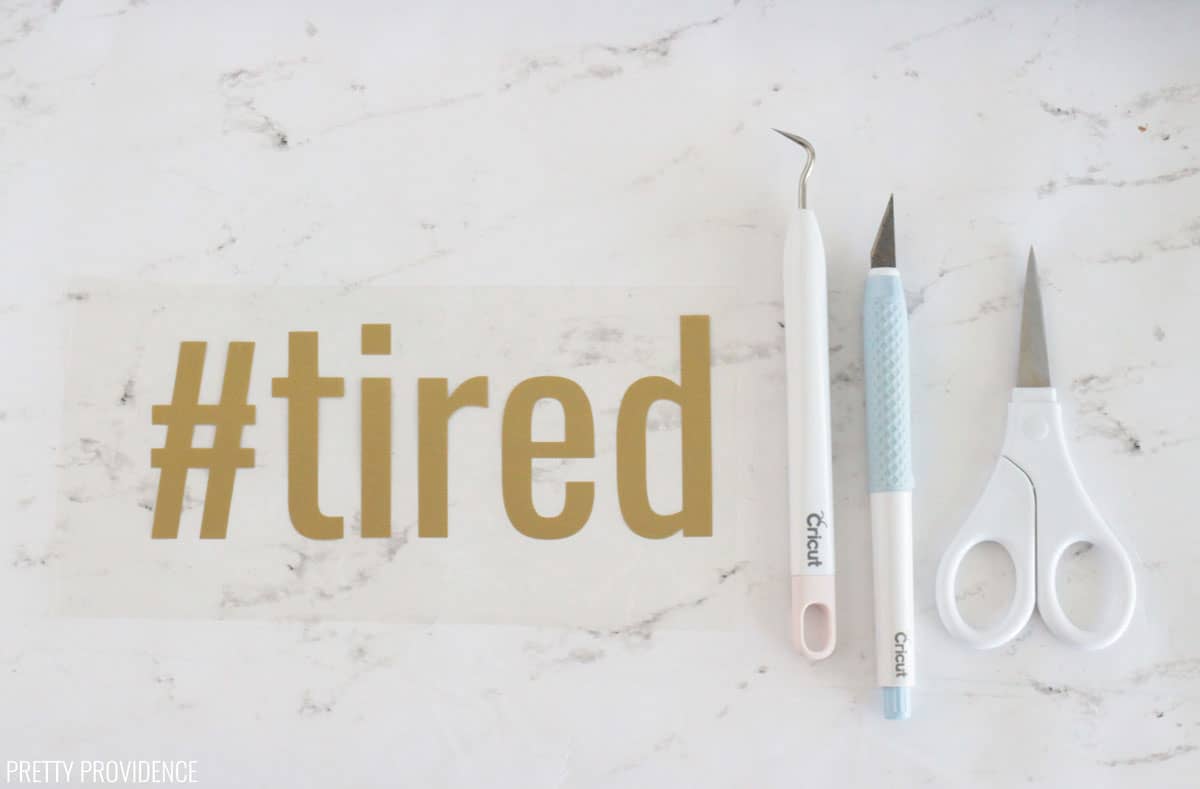
Once your design is cut and weeded, y'all can iron it on!
How to Iron on to a T-Shirt
Using an Iron
- Set your iron to 'Cotton' or the hottest setting it has. Make sure steam is turned OFF.
- Showtime by getting the material warm. Printing the iron onto the shirt for almost 15 seconds.
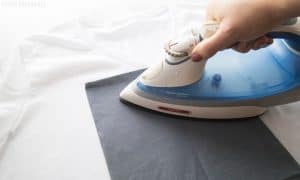
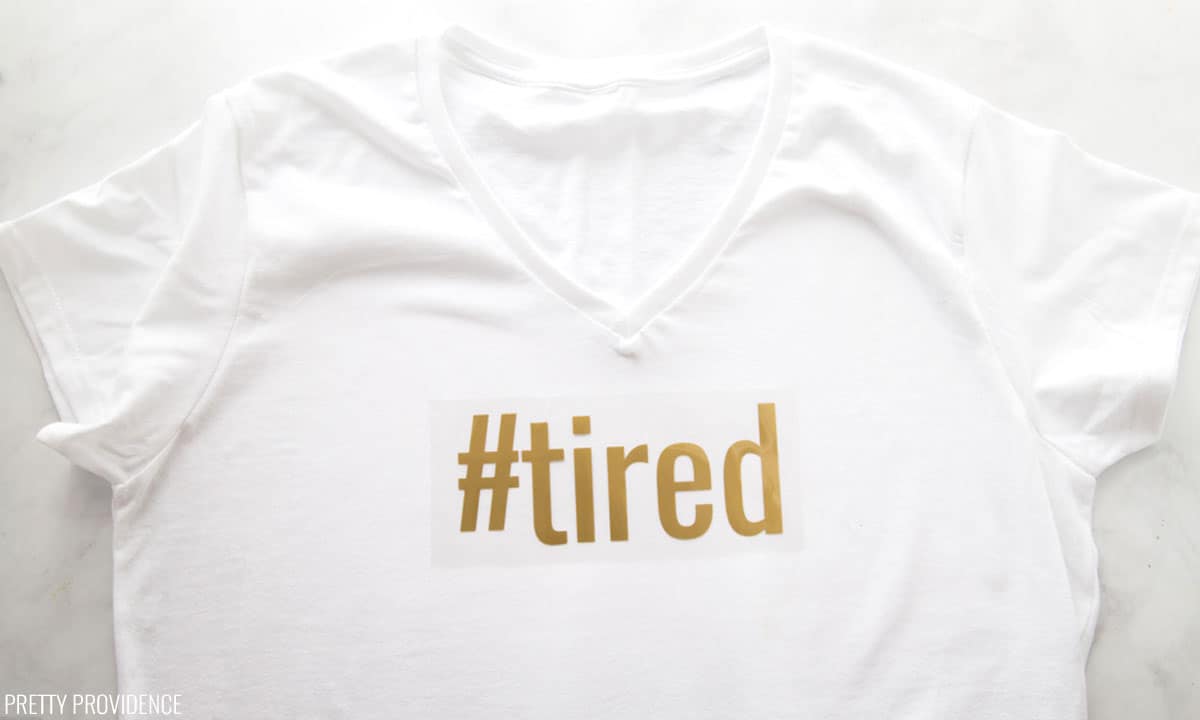 Place your fe-on vinyl where yous'd like it. Put a printing material, or plain cotton wool fabric, on top of the plastic. This is important & volition reduce the risk the of plastic melting onto your shirt.

Press the iron on top of the press material for about 30 seconds. Flip your shirt over, and do the aforementioned affair on the opposite side of the shirt.
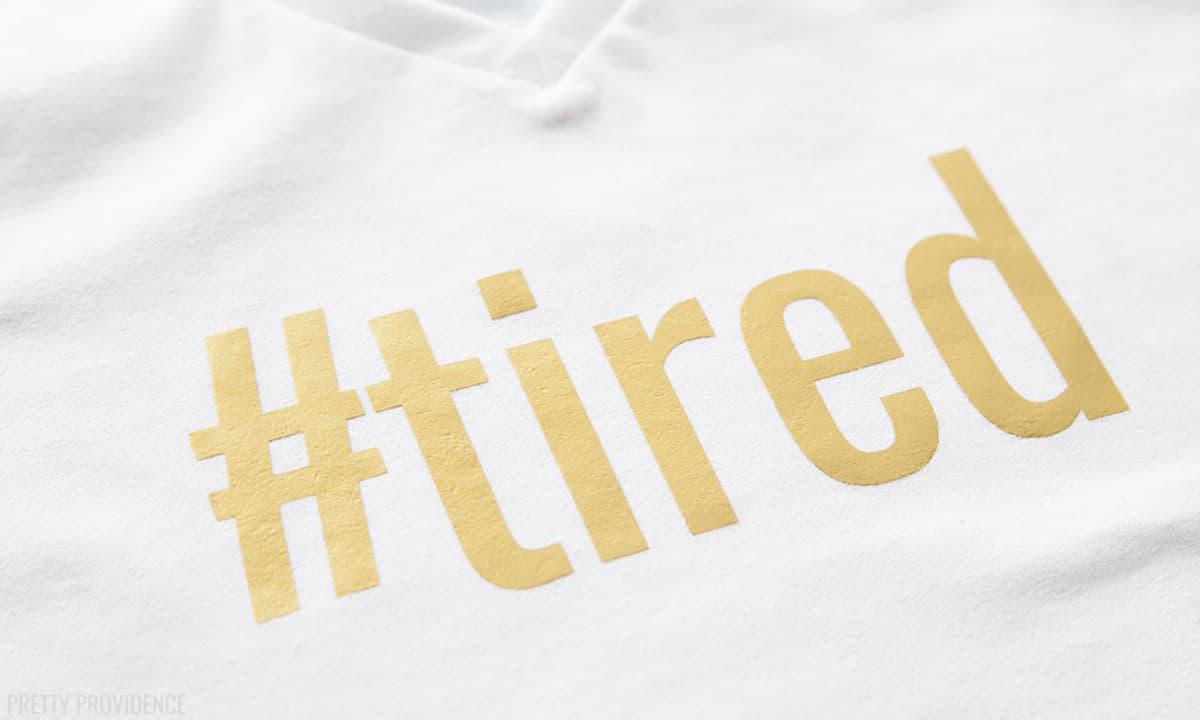
Now you will peel the plastic sheet diagonally to separate it from the vinyl. Do this while it'due south still warm!
Using an EasyPress 2
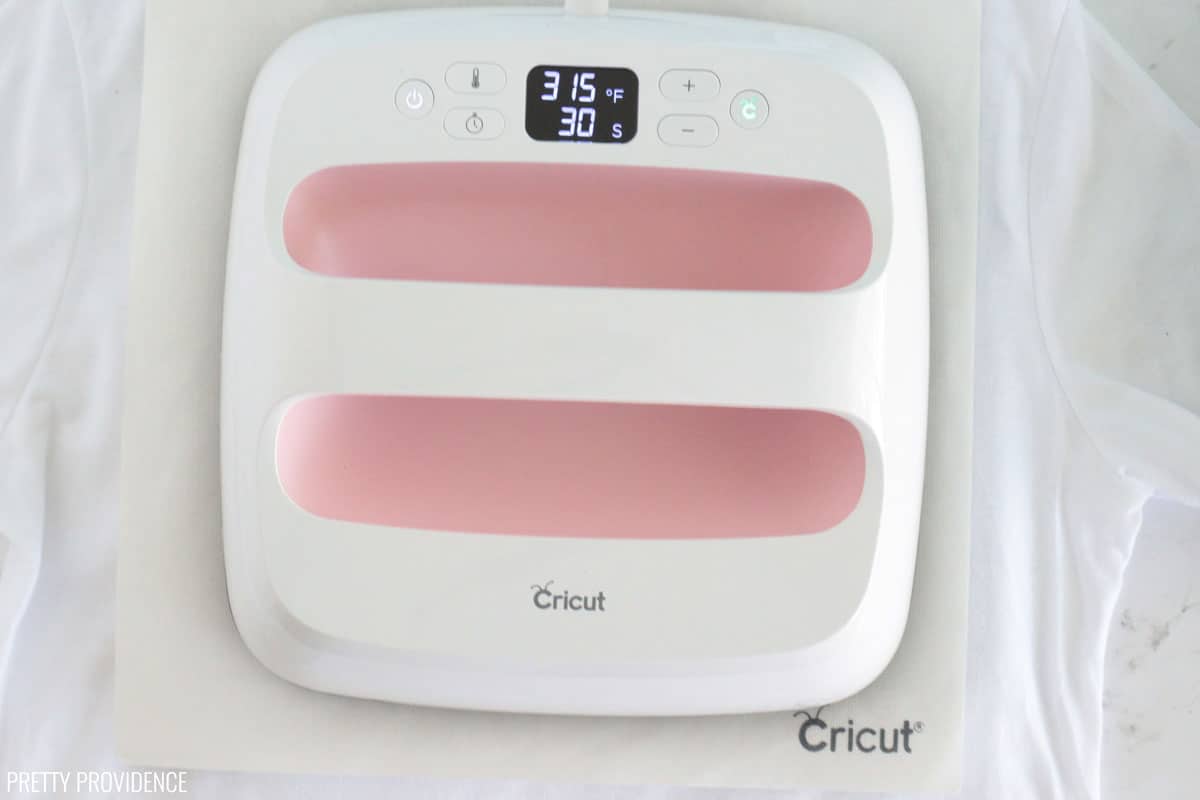
Heat the EasyPress 2 to the temperature recommended on the EasyPress settings guide. 315 degrees is the setting for cotton t-shirts and Everyday Atomic number 26-On.
Put the design on the t-shirt, so a press cloth or an Iron-On protective sheet, and use the EasyPress 2 to transfer the vinyl onto your shirt! The buttons on the EasyPress will help yous count down for the amount of time you are pressing for.
Pro Tips:
- If a slice isn't staying on the shirt, put the plastic and iron-on back down and press the iron back on for a few seconds. Put the press material or iron-on transfer sheet dorsum on and practice another run with the iron so you know it's on there really well.
You're done!
We take outlined every pace, so it might seem similar a lot, but information technology's really simple. In one case you make i or two, you lot'll be a pro Cricut shirt maker too and y'all won't desire to terminate!
Want to make sure y'all don't miss a pace? Impress this Iron-On checklist from Practical and Pretty, and for more inspiration cheque out all of our friend Anna's Cricut projects. We honey this Fe-On Growth Chart so much!
Go ahead and print these instructions or bookmark this page if yous want to proceed them handy. If yous find this tutorial helpful, please get out usa a comment and positive review!

-
Cricut Machine
-
Standard Grip Mat (green Cricut mat)
-
iron
-
Press Fabric
-
EasyPress two (optional)
-
Weeding Tool (optional)
-
Iron-On Protective Sheet (optional)
- Iron-On Vinyl
- Plain T-Shirt
Prepare Your Pattern in Cricut Design Infinite
-
Design within Cricut Blueprint Infinite or upload an SVG file to apply for your t-shirt.
-
Size the design to fit your t-shirt. Use a ruler to measure out on your t-shirt to decide how big it should exist. *See notes for more than on this.
-
Select 'Make It'
Gear up to Cut
-
Printing atomic number 26-on vinyl onto the light-green StandardGrip Cricut mat, shiny-side-down.
-
Make sure that you lot plow 'mirror' on. Your design should appear backward.
-
Select 'Go along' and cull material settings. For the Cricut Explore/Explore Air 2 machines y'all turn a punch to 'Atomic number 26-On' - for the Cricut Maker or Cricut Joy you will select 'Everyday Iron-On' in Design Infinite.
-
Cheque that everything is set correctly and then follow prompts to load the mat and cut atomic number 26-on design.
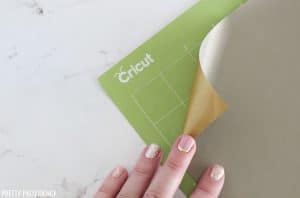
Weed Fe-On
-
Remove excess fe-on from the outside edges around your design and whatsoever little bits from the insides of messages or inside the pattern.
-
Once the pattern is weeded, you are set up to iron information technology on.

Iron On to the T-Shirt - Using an Iron
-
Plow on your household fe and prepare it to 'cotton' or the hottest setting information technology has. Make sure the steam is turned off.
-
Printing the iron down onto the t-shirt for about 15 seconds to get information technology warm. Then, identify the iron-on downward onto the shirt where you lot want to atomic number 26 it.

-
Put a press cloth (thin piece of fabric) down on top of the plastic, and press the iron downwards for 30-sixty seconds. Plow the shirt over carefully, and printing the fe down on the back of the shirt.
-
Wait until the plastic is warm, only not hot, and slowly pare the plastic diagonally off of the iron-on. You lot are done!

Iron on to the T-Shirt - Using an EasyPress 2
-
Plow EasyPress ii on and oestrus to 315 degrees.
-
Place the iron-on onto the shirt where you lot want it to be. Comprehend design with a press cloth or Fe-On protective canvas.
-
Printing EasyPress down onto the design with medium pressure for 30 seconds. Remove the EasyPress for a few seconds and and so repeat press once more for thirty more seconds.
-
Remove the iron-on protective sheet. Pare plastic off of iron-on when it is warm to the touch on (no longer hot, but not all the way absurd.) Pare diagonally from i corner.
-
You are done! You are at present officially a Cricut shirt maker.

Pro Tips:
- Use a ruler, or your Cricut mat, to measure how many inches across the shirt you want to cover. I similar to measure every shirt since they always vary in sizing.
- Be mindful of how wide your design is. I recommend leaving at least a few inches on either side of your design so that information technology doesn't bend to the side and come across the armpits of the t-shirt.
- Use a t-shirt template in Cricut Design Space to assist you make up one's mind how and where to identify your pattern.
Exercise you have more questions about Cricut or a desire for more in depth tutorials similar this? Check out this amazing grade!
Our friend Kim from Sweetness Red Poppy made this Cricut Made Easy Course and information technology is beyond amazing you guys! So worth it if you really want to invest in growing your Cricut knowledge. Hither is a sampling of what it includes:
- 19 Video Modules(Chapters)
- 50+ Step-by-Step Video Tutorials
- thirty+ Cricut Cheat Canvas Printables
- 160+ Page E-Book "Maker's Guide to Cricut"
- All iii Cricut Machines Covered (Maker/Joy/Explore family)
- 16 Different Projects with Printable Guides
- 80+ High-Quality SVG Files
- Print and so Cut Sticker Files
- Design Infinite Glossary
- Exclusive Facebook Support Grouping
- Tips and Tricks from an Proficient!
Click here to check it out! Or just go to our Cricut project gallery to run into ALL of our Cricut projects and tutorials!

This tutorial was originally published in June 2017. It has been completely updated with new photos, a more detailed tutorial, a video, and printable instructions!

What Are The Shirt Templates For On The Cricut Machine,
Source: https://prettyprovidence.com/make-custom-shirt-cricut/
Posted by: penaaple1993.blogspot.com
0 Response to "What Are The Shirt Templates For On The Cricut Machine"
Post a Comment